Blender: Simple Panel Texture

|
What you will need:
What you will learn:
|
This is a simple quick material that can be used for panelling. I have used a simular metail on many models over the years and I would like to share with you how to create it.
|
Step 1: UV map your model.
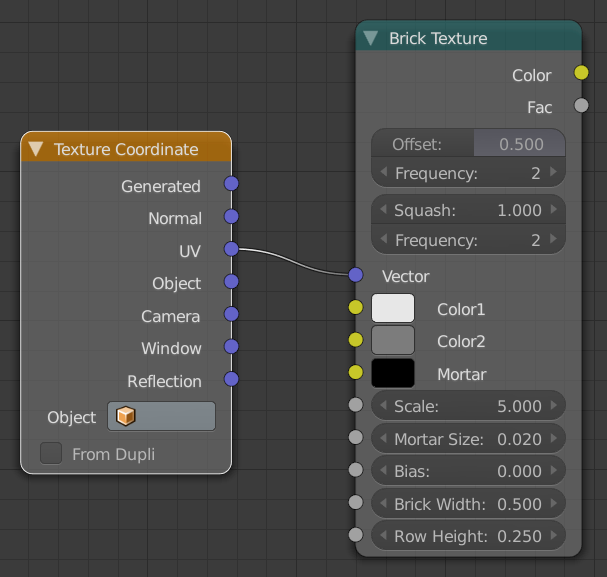
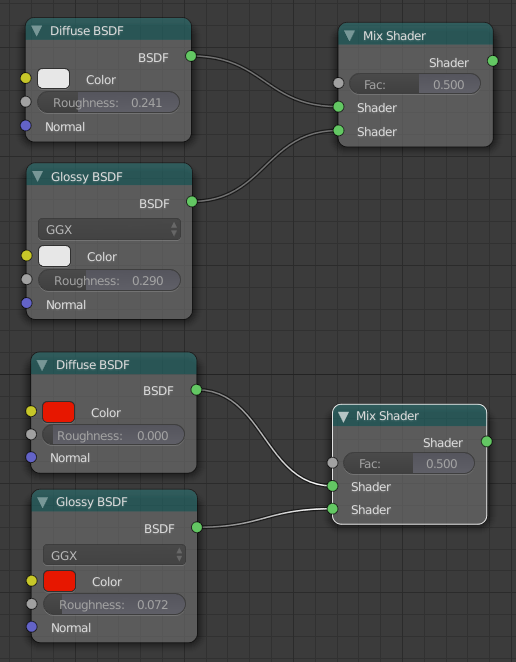
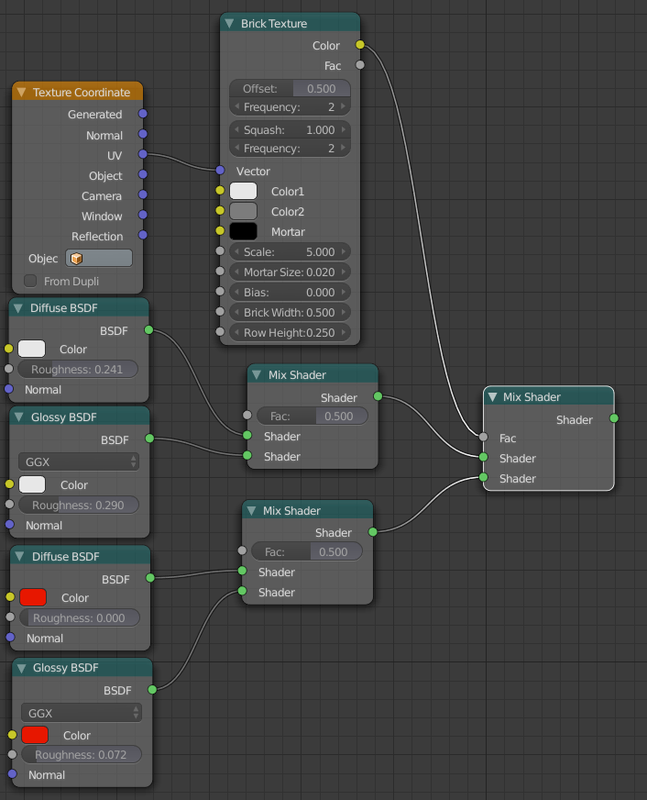
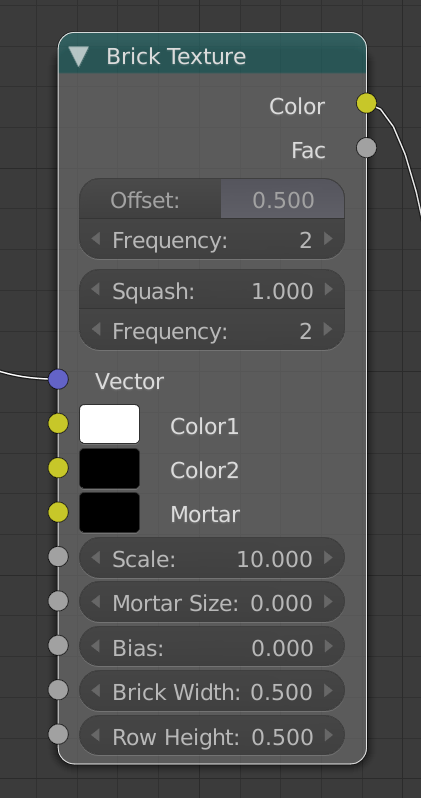
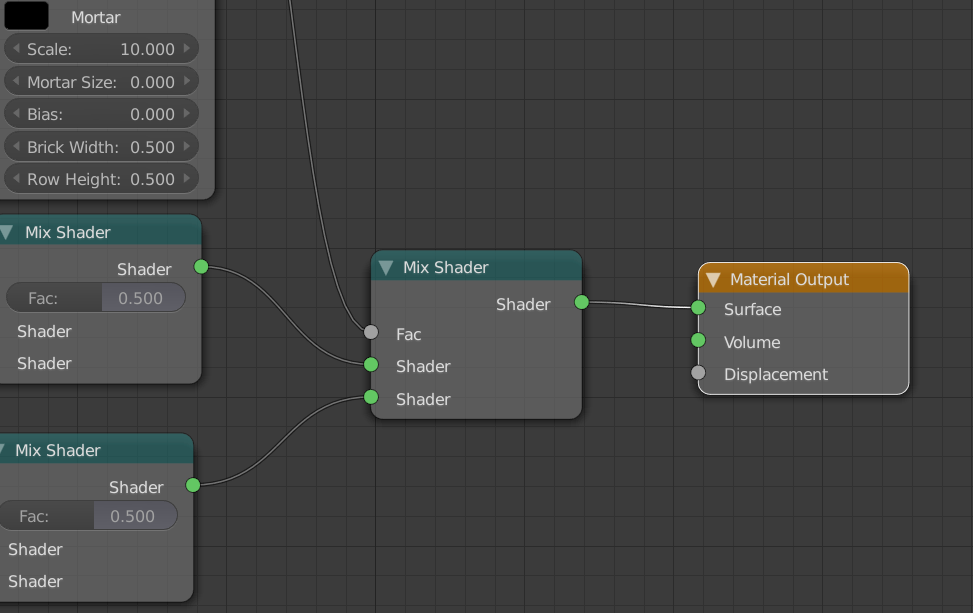
Sure you could use the generated options for creating this material but if you want a good material without distortions and that effects each part of your mesh correctly, its best to use a UV map. Try to use seems on your mesh to separate the UV layout to make straightening it out easier. Once done, go to step 2. You can alter the UV map if you find distortions later on. Step 2: Add a Brick Texture Nodes. Plug the vector input into a UV output from a Texture Coordinates node. This texture node will separate our two panel node set-up that we will add next. Step 3: Create two Panel materials. This is how each panel in the texture will look. You will need a minimum of 2 of these set-ups. I typically use a Diffuse node mixed with a Glossy node. This can be used to give the look of most metals and plastics but any type and number of nodes can be used. They all however need to come to a single output connection. Step 4: Connecting the Materials to the Texture. Connect the two materials to a single Mix Shader node. Doesn't matter which one is first. Then connect the Brick Texture node to the Mix Shader nodes Fac input. Step 6: Configure the Texture. Go over to the brick texture node. Set the 1st Colour value to pure white and the 2nd to pure Black. Make sure the mortar colour to Pure Black as well and change the Mortar size to 0 as we wont be using it. Adjust the Sizes till you find the ones you like. Doing this will create a black and white texture which are good for creating this type of effect. It can also be used with a Math node set to Multiply to create a displacement effect on the material Step 7: Finishing Connect the Mix Shaders output to the Surface input of the Material Output node. That should be it. BONUS Step 8: Easier Colour Change. You can duplicate the Brick texture and plug it into the colour vales of your pannel set-ups. This makes changing the colours easier as there are only 2 inputs instead of 4. DO NOT CHANGE ANYTHING BUT THE COLOURS ON THIS TEXTURE. Doing so can cause a rather unique look so don't do it unless you want that kind of look. |
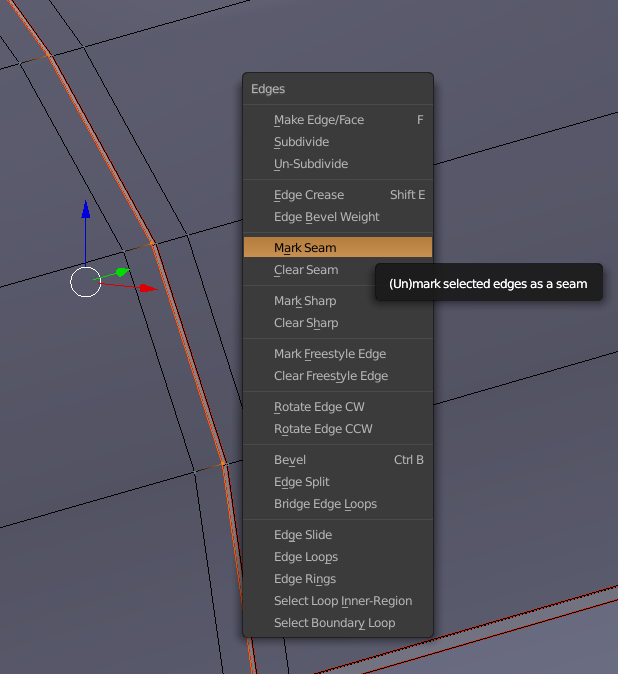
Ctrl E brings up the edges menu
|
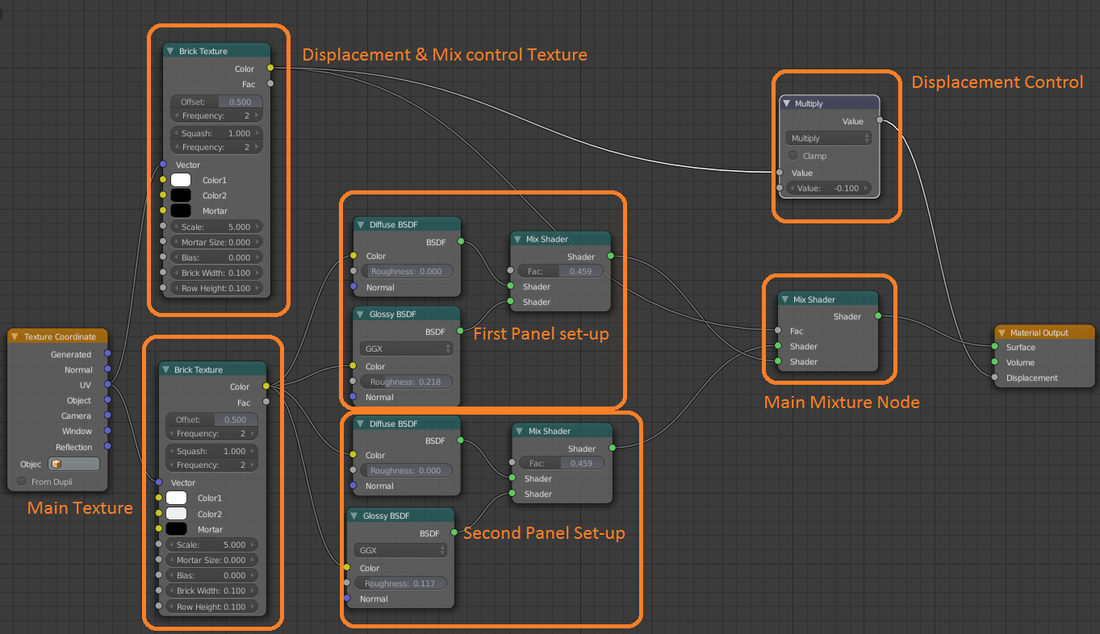
The node set-up I used on my Starship model
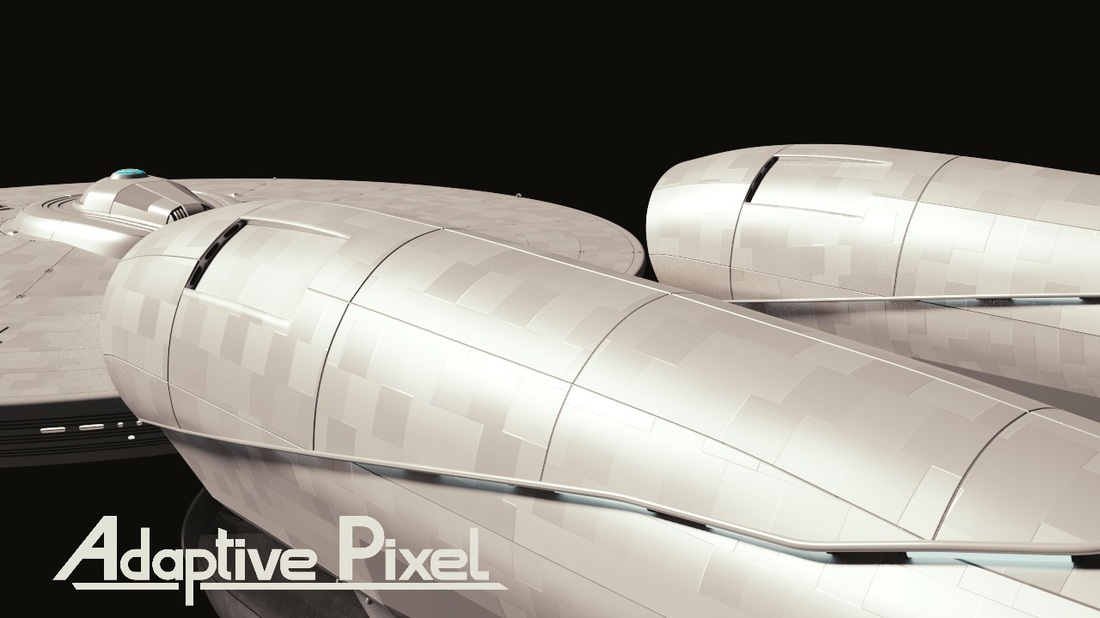
A simple example of how it can be used
If you liked this tutorial, why don't you share it, like it, reblog it. Can't hurt can it?
